はじめに
こんにちは、株式会社TOKOSのナオキです。
今回はGreenSock社のGreenSock Animation Platform(GSAP)/ScrollTriggerを使い、ちょっとリッチなスクロールアニメーションを実装していきたいと思います。GSAPの基本的な使い方は下記の記事を参考にしてください。
- WEB制作でスクロールアニメーション実装をしたい方
今回の完成予定
今回は以下のスクロールアニメーションをGSAP/ScrollTriggerを使用して実装してみたいと思います!
開発環境
- GSAP: 3.12.5
実装
今回はCDNで導入していきます。
以下のコードをbodyタグの最後に記述するだけです!
<script src="https://cdn.jsdelivr.net/npm/gsap@3.12.5/dist/gsap.min.js"></script>
<script src="https://cdn.jsdelivr.net/npm/gsap@3.12.5/dist/ScrollTrigger.min.js"></script>
<body>
  <div class="c-contents">
    <div class="c-contents__title-wrapper">
      <p class="c-contents__title">TOKOS.BLOG</p>
    </div>

    <div class="c-contents__section-title-wrapper">
      <section class="c-contents__section" id="section-title-1">
        <h2 class="c-contents__section-title">ABOUT</h2>
      </section>
      <section class="c-contents__section" id="section-title-2">
        <h2 class="c-contents__section-title">SERVICE</h2>
      </section>
      <section class="c-contents__section" id="section-title-3">
        <h2 class="c-contents__section-title">COMPANY</h2>
      </section>
      <section class="c-contents__section" id="section-title-4">
        <h2 class="c-contents__section-title">NEWS</h2>
      </section>
      <section class="c-contents__section" id="section-title-5">
        <h2 class="c-contents__section-title">CONTACT</h2>
      </section>
      <section class="c-contents__section" id="section-title-6">
        <h2 class="c-contents__section-title">END</h2>
      </section>
      <div class="separator"></div>
    </div>

    <div class="c-contents__images">
      <div class="c-contents__img" id="img-1">
        <img src="./img/img1.jpg" alt="" />
      </div>
      <div class="c-contents__img" id="img-2">
        <img src="./img/img2.jpg" alt="" />
      </div>
      <div class="c-contents__img" id="img-3">
        <img src="./img/img3.jpg" alt="" />
      </div>
      <div class="c-contents__img" id="img-4">
        <img src="./img/img4.jpg" alt="" />
      </div>
      <div class="c-contents__img" id="img-5">
        <img src="./img/img5.jpg" alt="" />
      </div>
    </div>
  </div>

 <script src="https://cdn.jsdelivr.net/npm/gsap@3.12.5/dist/gsap.min.js"></script>
  <script src="https://cdn.jsdelivr.net/npm/gsap@3.12.5/dist/ScrollTrigger.min.js"></script>
  <script src="js/script.js"></script>
</body>
body {
  background-color: #262626;
  color: #fff;
  font-family: "Shippori Mincho";
}

img {
  width: 100%;
  height: 100%;
  object-fit: cover;
  object-position: center;
}

.c-contents {
  width: 100%;
  height: 100%;
}

.c-contents__title-wrapper {
  position: fixed;
  top: 50%;
  left: 50%;
  transform: translate(-50%, -50%);
  z-index: 0;
}

.c-contents__title {
  font-size: 24px;
  font-weight: bold;
}

.c-contents__section {
  margin: 150vh 0;
}

.c-contents__section-title {
  font-size: 100px;
  font-weight: bold;
  text-align: center;
}

.c-contents__images {
  position: fixed;
  top: 50%;
  left: 50%;
  transform: translate(-50%, -50%);
  width: 1000px;
  height: 600px;
}

.c-contents__img {
  width: 100%;
  height: 100%;
  position: absolute;
  clip-path: polygon(0% 100%, 100% 100%, 100% 100%, 0% 100%);
  overflow: hidden;
}

.separator {
  width: 100%;
  height: 200px;
}
これで全体のレイアウトは一旦オッケイです!
ここからGSAP/ScrollTriggerを使用してスクロールアニメーションを加えていきます。
function imageScale() {
  gsap.utils.toArray("section").forEach((section, index) => {
    const image = document.querySelector(`#img-${index + 1} img`);

    gsap.to(image, {
      scrollTrigger: {
        trigger: section,
        start: "top center",
        end: () => {
          const viewportHeight = window.innerHeight;
          const sectionBottom = section.offsetTop + section.offsetHeight;
          const additionalDistance = viewportHeight * 0.5;
          const endValue = sectionBottom - viewportHeight + additionalDistance;
          return `+=${endValue}`;
        },
        scrub: 1,
      },
      scale: 2,
      ease: "none",
    });
  });
}まずこのimageScale関数でスクロールに応じて画像を拡大するアニメーションを追加しています。gsap.utils.toArray("section")で全てのsectionタグ要素を選択しています。forEach((section,index)=>{})で選択されたselectタグのそれぞれの要素とindexを取得しています。gsap.to(image,{}これはGSAPのtoメソッドを使用し、image要素に対するアニメーションを設定します。
ここでようやくScrollTriggerを使用します。
ScrollTriggerのtriggerではアニメーションを発火させるきっかけを指定します。今回は各sectionがスクロールされたときに、アニメーションが発火するようにします。startはアニメーションが開始される条件を指定しています。今回は画像が見え始めてから徐々に画像を拡大したいのでこのように指定しています。
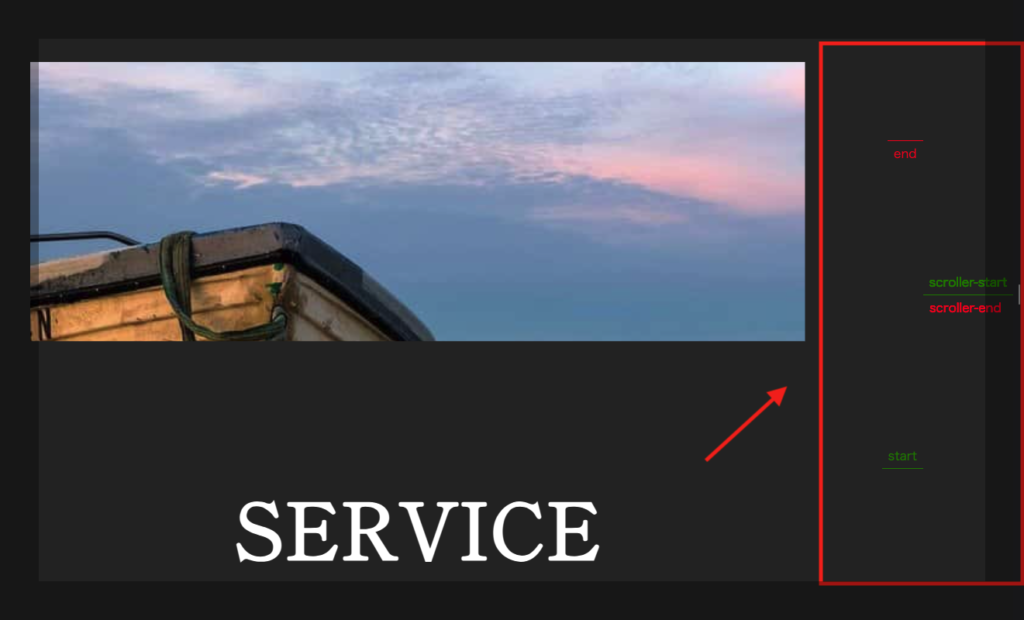
これによりスクロールしてsection要素が画面の中央に差し掛かったタイミングでアニメーションが開始されます。endはアニメーションが終了する条件を指定しています。今回は画像が表示され見えなくなるときにアニメーションが終わるように設定しています。markersというプロパティを使用すると以下のようにマーカーが表示されstart,endのタイミングがわかり、実装の手助けになります!

scaleで画像が拡大される量を示しています。今回は1=>2倍の大きさになるように設定しています。easeはアニメーションの動きの加速度を設定でき、今回はnoneなので等速になります。
ScrollTriggerのプロパティーについて詳しく知りたいという方は以下のサイトがわかりやすく説明してくれているので参照してください!
function imageShape(sectionId, imageId, endClipPath, start, end) {
  let section = document.querySelector(sectionId);
  let image = document.querySelector(imageId);

  ScrollTrigger.create({
    trigger: section,
    start: start,
    end: end,
    onEnter: () => {
      gsap.to(image, {
        scrollTrigger: {
          trigger: section,
          start: start,
          end: end,
          scrub: 0.125,
        },
        clipPath: endClipPath,
        ease: "none",
      });
    },
  });
}

const totalSections = 6;

for (let i = 1; i <= totalSections; i++) {
  let currentSection = `#section-title-${i}`;
  let prevImage = `#img-${i - 1}`;
  let currentImage = `#img-${i}`;

  imageShape(
    currentSection,
    prevImage,
    "polygon(0% 0%,100% 0%,100% 0%,0% 0%)",
    "top bottom",
    "center center"
  );

  if (i < totalSections) {
    imageShape(
      currentSection,
      currentImage,
      "polygon(0% 0%, 100% 0%, 100% 100%, 0% 100%)",
      "center center",
      "bottom top"
    );
  }
}
このimageShape関数では画像の表示を変化させるためのアニメーションを追加しています。
先ほど使用していたプロパティの説明は割愛させてもらいます。
clipPathは要素の形状を指定するプロパティです。
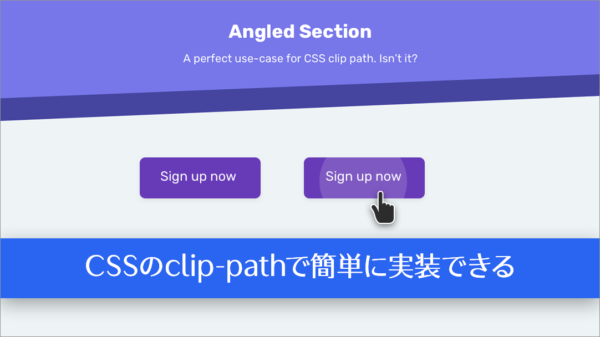
以下のサイトがclipPathについてわかりやすく説明してくれているので詳しく知りたい方は参照してください!
CSSにてデフォルトのclipPathを指定し、こちらで変化後のclipPathを指定することで、画像が下から徐々に表示され、下から徐々に消えていくように実装できます。
function imageScale() {
  gsap.utils.toArray("section").forEach((section, index) => {
    const image = document.querySelector(`#img-${index + 1} img`);

    gsap.to(image, {
      scrollTrigger: {
        trigger: section,
        start: "top center",
        end: () => {
          const viewportHeight = window.innerHeight;
          const sectionBottom = section.offsetTop + section.offsetHeight;
          const additionalDistance = viewportHeight * 0.5;
          const endValue = sectionBottom - viewportHeight + additionalDistance;
          return `+=${endValue}`;
        },
        scrub: 1,
      },
      scale: 2,
      ease: "none",
    });
  });
}

imageScale();

function imageShape(sectionId, imageId, endClipPath, start, end) {
  let section = document.querySelector(sectionId);
  let image = document.querySelector(imageId);

  ScrollTrigger.create({
    trigger: section,
    start: start,
    end: end,
    onEnter: () => {
      gsap.to(image, {
        scrollTrigger: {
          trigger: section,
          start: start,
          end: end,
          scrub: 0.125,
        },
        clipPath: endClipPath,
        ease: "none",
      });
    },
  });
}

const totalSections = 6;

for (let i = 1; i <= totalSections; i++) {
  let currentSection = `#section-title-${i}`;
  let prevImage = `#img-${i - 1}`;
  let currentImage = `#img-${i}`;

  imageShape(
    currentSection,
    prevImage,
    "polygon(0% 0%,100% 0%,100% 0%,0% 0%)",
    "top bottom",
    "center center"
  );

  if (i < totalSections) {
    imageShape(
      currentSection,
      currentImage,
      "polygon(0% 0%, 100% 0%, 100% 100%, 0% 100%)",
      "center center",
      "bottom top"
    );
  }
}
さいごに
今回はGSAP/ScrollTriggerを使用して、ちょっとリッチなスクロールアニメーションを紹介しました。
GSAPをしようすることで沢山のアニメーション処理を行うことができるのでぜひ使用してみてください!
 ISSEN
ISSEN 


